How to Install Crown Molding
If you are planning to do some updates to your home to make it look more modern and attractive, crown molding is an excellent option to improve the over look of your home. And with the brief guide below, supplied by your Vancouver Handyman Edward you’ll be able to install it yourself!
Choosing the Type of Crown Molding
The first step (other than ensuring you have the proper tools) is to choose the type of crown molding you’d like to install. There are several different types available, so it’s really a matter of which one is the most aesthetically pleasing to you. Choose from different styles, such as basic convex or concave, to more unique styles that include different shapes and sizes within the design itself. Choose from a variety of materials including wood plaster, and PVC. And finally, choose the size of the crown molding.
Cut and Measure
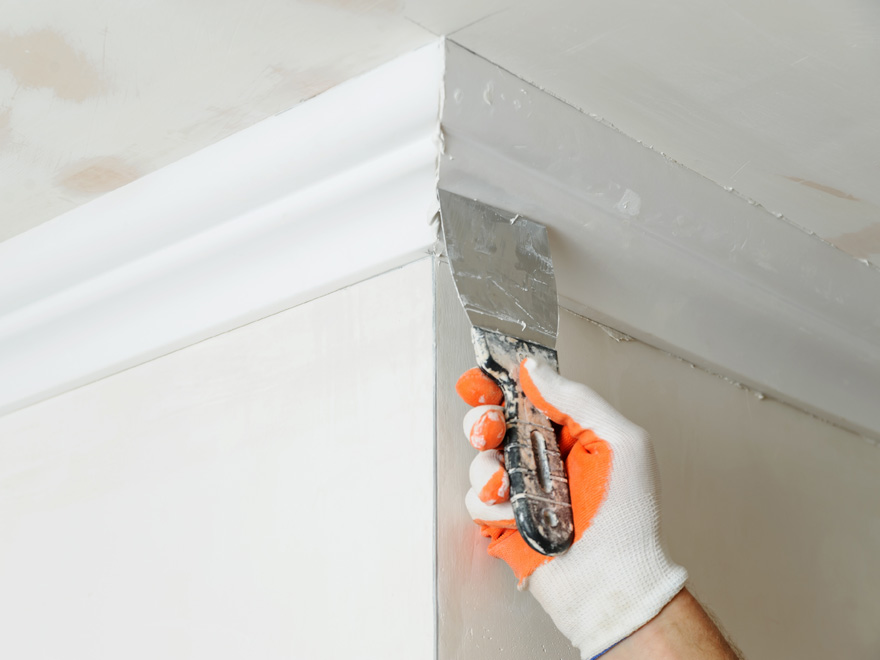
Once you’ve chosen the type of crown molding to use, it’s time to start cutting corners – no, we don’t mean leaving out steps – we literally mean cutting corners! Getting a good fit in the corners of your crown molding is probably the hardest part of the job! Because crown molding sits differently than basic flat trim, it requires the use of coping saw. This type of saw allows you to cut the pieces in such as way as to have a tight seal between the pieces. And don’t worry, if you can’t get the corners done perfectly, you can use a little bit of caulking to patch up minor gaps.
Once you’ve gotten the corners cut and in place, the rest of the job is fairly simple. You’ll need to measure out the remaining lengths of crown molding, that will be applied to the rest of the wall surfaces, then cut them. For this particular phase of the job, a basic table saw works best.
Note – if you’re not comfortable with cutting the corners yourself, a simple alternative is to use corner blocks – pre-cut corner pieces that will blend in easily and look attractive with any type of crown molding. Simply attach them to the wall corners, and avoid having to worry about cutting and fitting!
Attach to the Wall
Once you’ve measured and cut your remaining lengths, it’s time to actually apply them to the wall. This is fairly simple, however you will need to do minor adjustments on the edges of the pieces that meet. This process is called coping. Coping is basically making adjustments to the edges that meet to ensure they are lined up and even, versus gappy and interrupted. You can use a spare piece of scrap molding as a guide.
When attaching crown molding to the wall, it’s important to try and nail it to the existing wall studs. This will help ensure a super snug fit, and reduce the risk of the pieces becoming loose.
It’s best to use a nail gun for this process, as using a hammer and nails could result in cracks and splits in the crown molding. A nail gun will be quick and easy and will rarely damage the pieces of crown molding.
Starting from one end, begin nailing the pieces to the wall. If you are using a particularly long piece, you may need a helper to hold it in place, otherwise, continue on until all of your crown molding is in place!
Finish up by applying caulk to any minor gaps, then paint or repaint if necessary. And of course if you run into any problems, contact your local Vancouver Handyman!